Studio Monitor Placement, How to Set Up Your Monitors
Studio monitor placement means putting your two monitors and your head at the three points of an equal-sided triangle, tweeters at ear height, angled about 30 degrees inward, and pulled a little off the walls behind and beside them. Get that right and a cheap pair sounds honest. Get it wrong and a pair worth more than my first car still lies to you. (Yes, monitors lie. Mine gaslit me for a year before I moved the desk half a metre.)
The short version. Good studio monitor placement is an equal triangle between the two speakers and your head, tweeters level with your ears, each monitor angled in toward you, off the desk on stands or pads, and away from the wall behind. Then you sit on the room's centre line, treat the first reflection points, and trust your ears over any tape measure. A solid nearfield pair like the Kali Audio LP-6 costs around €230 a speaker, and the placement costs nothing but ten careful minutes. Best move of all, hear a pair set up properly at our Warsaw showroom.
The triangle is the whole game
Start here, because nothing else matters until this is right. Your two monitors and your head form an equilateral triangle, all three sides the same length. If the speakers sit 1.2 metres apart, your head sits 1.2 metres from each one. That symmetry is what builds a stereo image you can trust, where the centre of the mix lands dead centre and nothing drifts left or right on its own. The spot at the point of that triangle is the sweet spot, and it is smaller than most people think.
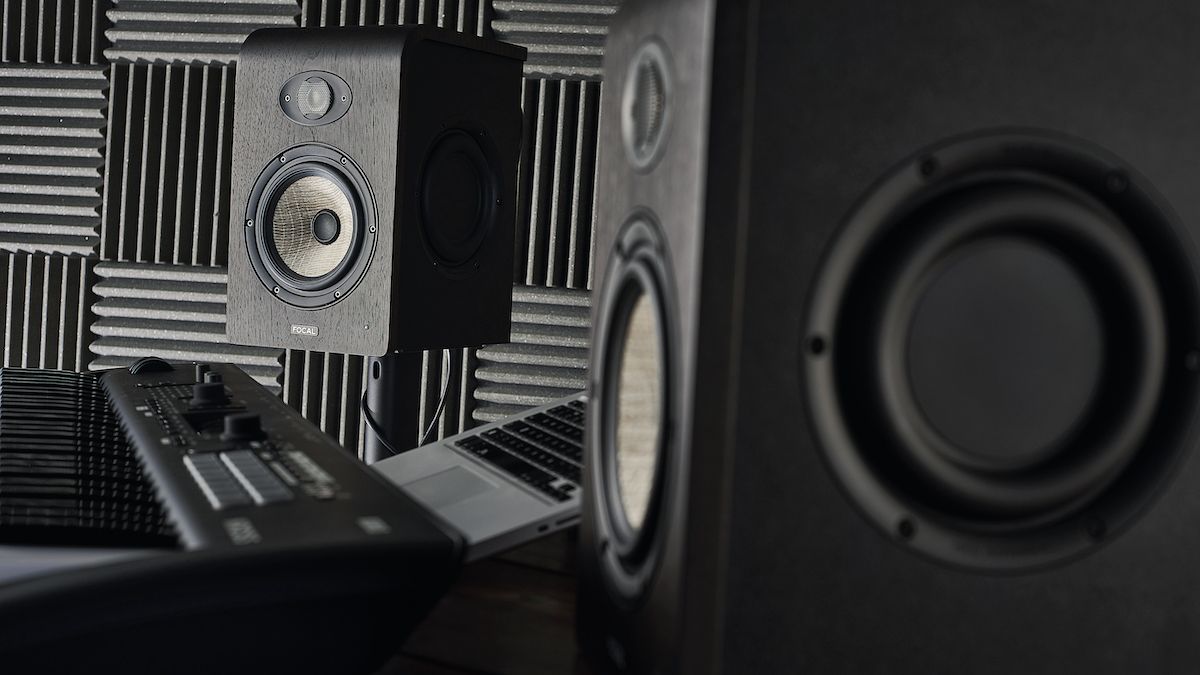
Keep the two distances honest and the rest of this guide gets easier. Get lazy with it, park one speaker a little closer because a shelf was in the way, and you have started mixing on a lie before you touched a fader. Set a pair up by eye and a few centimetres of error is easy to miss, while your kick drum quietly moves slightly to the left. Measure the triangle. Do not trust your eyes, trust a tape.
Tweeters at ear height, not desk height
The tweeter is the small driver that makes the high frequencies, and high frequencies are fussy about where they point. Line the tweeter up with your ears when you are sitting in your normal working position. If the monitor sits flat on the desk the tweeter usually ends up around chest height, firing the treble at your collarbone while your ears get the leftovers. That is why so many home mixes come out dull, then turn harsh the moment someone plays them on a phone.
This is where stands and isolation earn their keep. A pair of dedicated stands or a set of decoupling pads like the IsoAcoustics ISO-155 lift the tweeter to ear height and stop the cabinet from using your desk as a giant resonating soundboard. A monitor bolted straight to a desk pumps energy into the wood, the wood sings back late and out of tune, and your low mids turn to mud. Around €122 of isolation does more for clarity than the next monitor up the range. Browse the stands and studio furniture if your desk is doing the singing.
How far from the wall, and why the advice contradicts itself
Search this and you get two answers that flatly disagree. One camp says pull the monitors well off the front wall, 40 to 60 centimetres or more. The other says shove them almost against it. Both are right, and the reason nobody explains it is that they are solving the same problem two different ways. That problem is a dip in the bass caused by sound bouncing off the wall and arriving back out of step with itself, cancelling a chunk of your low end. Engineers call it the boundary dip.
You dodge it by making the reflection either negligible or immediate. Far from the wall, the reflected bass is quiet enough to stop mattering. Almost touching the wall, it comes back so fast it stays in step. The one place you must not land is the messy middle, roughly 30 to 90 centimetres out, where the cancellation sits right in the range your kick and bass live in. So pick a lane. In most home rooms I nudge monitors to about 40 to 60 centimetres off the front wall and treat the wall behind, because "almost touching" is rarely practical on a real desk. Whatever you choose, keep both monitors the same distance from their side walls, or the symmetry you built with the triangle falls apart.
Where you sit in the room decides the bass
Here is the trick none of the big manufacturer guides put up front, and it is the one that fixes more rooms than any speaker swap. A rectangular room has strong bass peaks and nulls at simple fractions of its length. Sit in a null and the bass vanishes, so you crank it in the mix and everything booms everywhere else. The reliable starting point is the 38 percent rule. Measure the room's length, and place your listening position about 38 percent of that length from the front wall. In a 4 metre room that is roughly 1.5 metres back.

Set the desk and monitors along the shorter wall, fire the sound down the length of the room, and sit at that 38 percent mark. It will not be perfect, no calculator survives contact with a real room, but it lands you far closer to even bass than the default of jamming the desk into whatever corner the door left free. Move a metre and your bass changes more than a €1,000 upgrade ever would. Nine times out of ten the room, not the monitor, is the thing lying to you.
Angle them in, about thirty degrees
Point each monitor at your head, not straight down the room. Toe them in so each one aims at your ears, which works out around 30 degrees off the wall for most desks. This tightens the centre image and, as a bonus, sends less high frequency bouncing off the side walls to smear the sound on its way back. If you want to fine tune it, play something with a strong centre vocal and swing the angle a few degrees each way until the voice snaps into a single point between the speakers rather than smearing across them.
Vertical or horizontal, and when it matters
Most nearfields are designed to stand upright, tweeter over woofer, and that is how you should run them unless the maker says otherwise. Lay a monitor on its side and the two drivers now sit apart horizontally, which wrecks the sound anywhere off the exact centre line and widens the gap where the drivers hand over to each other. Some monitors are built to lie down and have a centred or rotatable tweeter for exactly this reason, but do not assume yours is one of them. If it went in the box standing up, keep it standing up. Your desk looking tidier is not worth a hole in the midrange.
The desk and the walls are cheating, and treatment is the fix
Here is my one hill to die on. Room treatment beats a monitor upgrade almost every time, and it is not close. I had a customer with monitors worth around 8,000 zł, call it 1,800 euros, in a bare square Warsaw flat who still could not trust his low end. Every mix came back boomy in the car. We spent 300 zł, about 70 euros, on corner bass traps. That did more for his mixes than the expensive speakers ever had. A monitor is only ever as honest as the room around it, and a great pair in an untreated box is a Formula 1 car in a supermarket car park.
The two spots that matter most are cheap to fix. Put absorption at the first reflection points on the side walls, find them with the mirror trick, have a friend slide a mirror along the wall while you sit in the sweet spot and mark every place you can see a speaker in it. Then put bass traps in the corners behind you, where low end piles up worst. A trap like the Mega Acoustic PB-PREMIUM runs about €46 a panel, and a few of them in the corners will out-perform your next speaker upgrade. The rest of the studio acoustics range covers the walls. Correction software can flatten a graph, but it cannot delete a slap-back echo off a bare wall behind your head. Fix the room first, every time.
Adding a subwoofer, if you go there
A sub is not a bass boost, it is a way to hear the bottom octave your small nearfields cannot reach. If you add one, place it and set its crossover by ear, not by the manual's diagram. The classic method is the subwoofer crawl, put the sub where you sit, play a bassy track, then crawl along the floor until the bass sounds evenest, and that spot is where the sub goes. Match its level to the monitors so you barely notice it is on, because a sub you can point to is a sub set too loud. Our studio subwoofers pair with most nearfields, but treat the room before you reach for one.
Then test it with your ears
Numbers get you into the ballpark, your ears close the deal. Once the triangle, height, distance and angle are set, play three or four tracks you know inside out, the ones you have heard on every system from a club rig to a kitchen radio. Listen for a stable centre, a bass that stays even as notes climb, and a top end that is clear without stabbing you. Small moves, a few centimetres, a couple of degrees, and re-listen. This is the part the spec sheet cannot do for you, and honestly it is the fun part. If you are picking the pair itself too, our guide to choosing active studio monitors runs alongside this one.

And this is exactly why we run a 30-day Test-Drive on eligible gear. You cannot judge placement in a shop, because our showroom is not your bedroom, your untreated corner or your slightly wonky desk. So take a serious pair home, set it up against this guide, live with it for a month, and only then decide. Whatever you land on, you get 36-month warranty across the range, a full 60 months on ADAM Audio and PMC, a 30-day return window, and delivery to every EU country.
Straight answers
How should studio monitors be positioned?
Put the two monitors and your head at the three corners of an equal triangle, tweeters level with your ears, each monitor angled about 30 degrees in toward you. Keep them off the desk on stands or pads, and the same distance from their side walls so the stereo image stays centred.
How far should studio monitors be from the wall?
Either close to the front wall or well off it, around 40 to 60 centimetres, but not in the 30 to 90 centimetre middle where wall reflections cancel your bass. Pick one approach, keep both monitors equal, and treat the wall behind them where you can.
What angle should studio monitors be at?
Toe each monitor in so it aims at your head, roughly 30 degrees off the front wall for a typical desk. Fine tune by ear on a track with a strong centre vocal until the voice locks into a single point between the speakers.
How do you set up studio monitors in a small room?
Fire them down the length of the room from the shorter wall, sit about 38 percent of the room's length back from the front, and keep the triangle tight. Small rooms live or die on treating the corners and first reflection points, so budget for a few bass traps before a bigger pair.
Do studio monitors need stands or isolation pads?
Almost always, yes. Stands or decoupling pads lift the tweeter to ear height and stop the cabinet from resonating through your desk, which is a common cause of muddy low mids. It is one of the cheapest upgrades in the whole chain.
How do I connect studio monitors to an audio interface?
Run one balanced cable, TRS or XLR, from each output of your interface to each monitor, one left and one right. Our audio interface guide covers the outputs to look for, and a monitor controller adds a single volume knob if you want one.
Placement is the rare studio upgrade that costs nothing and beats most of the ones that cost plenty. Measure the triangle, lift the tweeters, mind the wall, and let your ears do the last 10 percent. Then come by the showroom, tell us about your room, its shape, its corners, that one wall you cannot move, and we will argue about bass traps until closing. Bring the tracks. We have got the coffee and an honest opinion.
About the author
Michał Kaniuszkiewicz is a content manager and SEO specialist at Wired Tunes. He creates and optimizes content that helps readers find useful information about music, gear, and sound. Beyond his editorial work, he has been making music for 8 years in hip-hop, pop, and electronic genres — giving him insight into the subject not just from an SEO perspective, but from the inside, as a practicing musician and producer. This experience allows him to create content that's equally useful and clear for both beginners and experienced listeners and music creators.


Kii SEVEN System FineTouch White 3-way DSP-Controlled Active Monitor System (Pair)
Read next
- SPL of Studio Monitors, What It Is and Why It Matters. Placement is sorted, now how much level your room actually needs.
- How to Read the Frequency Response of a Studio Monitor. How to tell a graph that means something from a graph that sells something.
- Open-Back vs Closed-Back Headphones, Which to Choose. The second pair of ears you check your monitors against.